Living room staging for photos that makes your space feel open
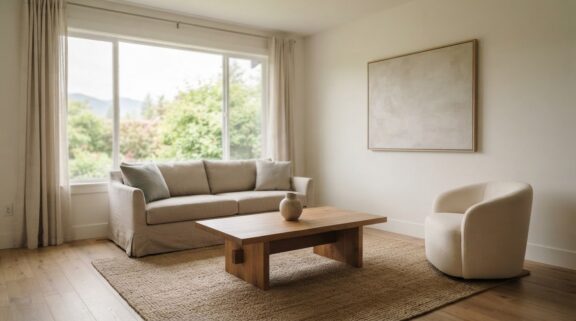
A room can look larger in listing photos when you remove more than you add. Effective living room staging for photos starts by keeping only the furniture that supports the room’s function and flow; professional stagers may remove as much as half of a home’s furnishings to create a more open feel. Clear surfaces, neutral decor and fully opened curtains help the space feel calm, bright and easy to imagine living in.
It’s natural to want your living room to feel warm and personal, but photos can make extra furniture and everyday items more prominent than they seem in person. With a few thoughtful edits, you can preserve the room’s welcoming character while giving the layout more breathing room. Streamline furniture, choose quiet accents, put away personal items and make the most of natural light so the living room feels open and inviting on camera.
Key Takeaways
- Prioritize furniture that supports the room’s purpose, and arrange it to keep sightlines and walkways clear.
- Use understated artwork, rugs and accents to create a cohesive look without pulling attention from the space.
- Make window areas feel light and uncluttered so daylight can brighten the room in listing photos.
- Put away family photos and personal collections to help buyers picture their own lives in the home.
1. Reducing excess furniture to make a living room look more spacious
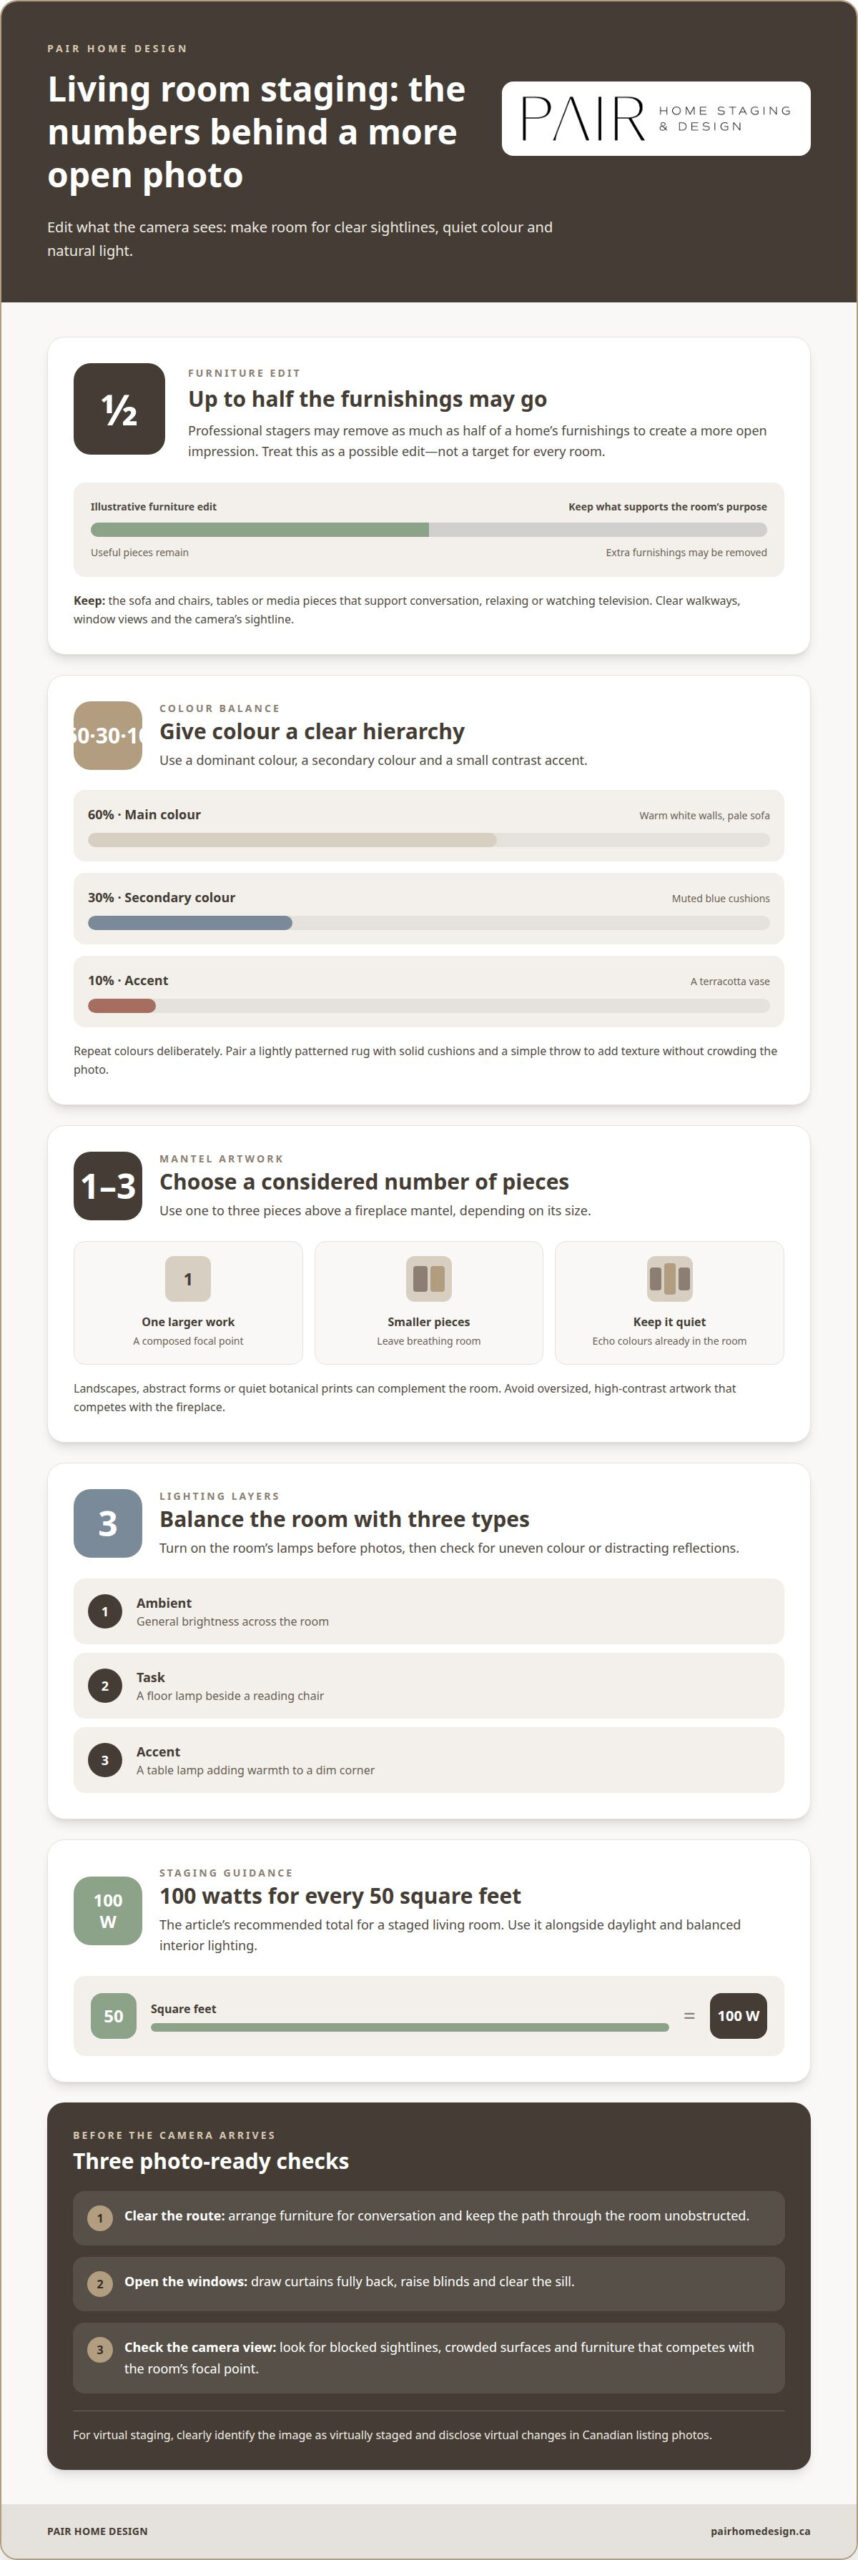
Start with the room’s main purpose: conversation, relaxing or watching television. Keep the sofa and only the chairs, tables or media pieces that support that use. Professional stagers may remove as much as half of a home’s furnishings to create a more open impression. A second armchair that blocks a window or a bulky side table with no clear function can make the layout feel crowded in photos.
Arrange the remaining furniture to create a natural conversation area and a clear route through the room. For example, angle two chairs towards a sofa, then leave the path from the doorway to the next room unobstructed. Check the camera’s view from each entrance: a chair back across the main sightline can make the space seem closed off. Keep furniture scaled to the room rather than filling every empty corner.
Make a fireplace a visible focal point instead of surrounding it with competing pieces. Position the sofa or chairs to face the hearth, leaving enough open floor to show the room’s shape. If a large cabinet, spare chair or extra coffee table crowds the fireplace wall, move it before photographing. A clear view of the hearth helps the arrangement feel deliberate.
Store furniture that won’t help the listing photos or showings away from the home. Extra chairs, seasonal pieces and personal furnishings can be put aside until the property is ready for move-in. Don’t shift unwanted items into a basement or spare room that will also be photographed. For effective living room staging for photos, each room should look purposeful, not like it’s storing overflow.
Should you use virtual staging or physical staging? Physical staging shows the actual furniture and layout buyers will see in person. Virtual staging can illustrate a possible arrangement in an empty room, but the image should be clearly identified as virtually staged. In Canadian listing photos, disclose virtual changes so viewers can distinguish the photographed space from digitally added furniture.
Common mistakes include keeping every seat, blocking windows, pushing all furniture against the walls and hiding clutter in another room that will be photographed. A crowded coffee table or oversized sectional can also dominate the frame. Edit the furniture, check the camera’s sightlines and keep walkways visibly clear.
2. Choosing neutral artwork and decor
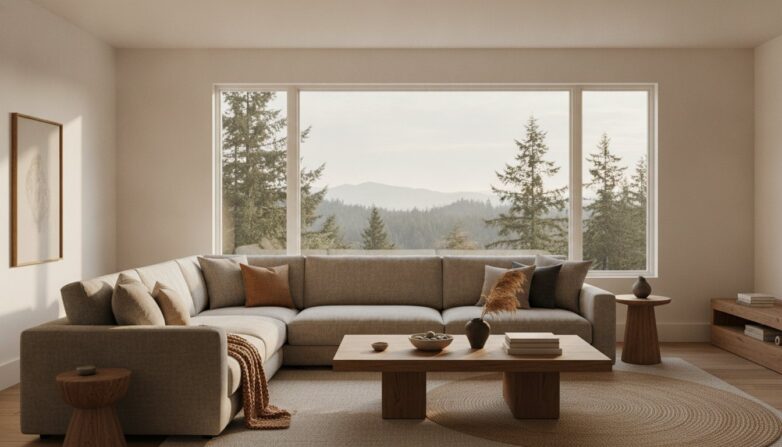
Choose decor that complements the living room without becoming its main subject. A neutral rug in ivory, beige or soft grey can anchor the seating area, while a subtle pattern adds texture without crowding the photo. Pair a lightly patterned rug with solid cushions and a simple throw to add warmth while keeping the overall impression calm.
A restrained colour plan helps separate the room’s layers. Use the 60-30-10 approach: make the main colour dominant, repeat a secondary colour through larger accents, then add a small amount of contrast. For example, warm white walls and a pale sofa can form the main field, muted blue can appear in cushions, and a terracotta vase can provide a modest accent. Repeat colours deliberately so the eye moves through the room.
Choose artwork that suits the wall and furniture beneath it. Above a fireplace mantel, use one to three pieces depending on its size: one larger work can feel composed, while smaller pieces need breathing room. Landscapes, abstract forms or quiet botanical prints can echo colours already in the room. Avoid oversized, high-contrast images that compete with the fireplace or make a small wall feel busy.
Keep accessories edited. Arrange three objects of varied heights, such as a low bowl, a medium vase and a slender candlestick, to create a balanced grouping on a console. Leave nearby surfaces open so each arrangement reads clearly in the camera frame. If colour and scale feel difficult to coordinate, a cohesive room styling plan can bring the artwork, textiles and accents together without making the space feel overly formal.
3. Maximizing natural light with minimal window treatments
Open curtains fully before listing photos so daylight can reach across the room. Heavy drapes pulled halfway can leave dark strips beside the windows and make the space feel smaller. If the window has layered coverings, raise the blinds and draw back the panels. Keep the sill clear of plants or ornaments that cast shadows across the frame.
For the best time of day, photograph the living room when its windows receive bright, even daylight. The right moment depends on the room’s orientation, nearby trees and weather, so look for soft light without harsh glare on the floor or television. If direct sun creates bright patches, adjust the timing or use a sheer panel to soften the light.
Natural light works best alongside balanced interior lighting. Staged living rooms should include three types: ambient lighting for general brightness, task lighting for reading areas and accent lighting for details. A floor lamp beside a reading chair can provide task light, while a table lamp adds a warm glow to a dim corner. According to common staging guidance, the recommended total is 100 watts for every 50 square feet. Turn on the room’s lamps before taking photos, then check for uneven colour or distracting reflections.
Pay attention to how window treatments frame the view. Simple panels in a light, quiet fabric add softness without competing with the glass. When open, position them outside the window rather than covering part of the frame. In a living room with a balcony door, make sure the curtain doesn’t obscure the entrance or create a dark vertical block in the photo.
Before the photographer arrives, test the room from the planned camera position. Compare a frame with the curtains fully open with one that softens the daylight, then choose the view that preserves detail across the window and seating area. This quick check helps the room feel bright while keeping the outdoor view and interior textures visible.
4. Removing personal items and choosing neutral artwork
Personal photographs can make a living room feel distinctly yours, but they also draw attention away from its features. Remove family portraits, children’s school pictures and framed vacation snapshots before listing photos. Buyers can then imagine their own lives in the home rather than studying someone else’s memories. Put the frames away together so they’re easy to restore after the sale.
Look beyond the walls. A shelf of family keepsakes, a team pennant above the television or a collection of souvenirs can make the room feel more personal. Clear these items from camera-facing surfaces, including the mantel, bookcase and coffee table. Keep a few useful objects, such as a simple bowl or neatly arranged books, to retain a lived-in feel.
Choose replacement artwork that creates a calm backdrop without making the room feel empty. A quiet landscape or abstract print can add colour without telling a strong personal story. Match its frame to nearby finishes, such as warm wood furniture or black window trim. Check the artwork from the photographer’s angle, since reflections on glass can distract from the room.
Make one final edit from the camera’s viewpoint. Remove personal names from awards, visible mail from side tables and photos from digital frames. Close screens showing family pictures, and check mirrors for reflections of private belongings. Store removed items in labelled boxes outside the living room rather than shifting them onto another surface that appears in the listing photos.
Neutralizing personal decor doesn’t mean stripping away all warmth. Keep a textured cushion, a soft throw or one understated accent that supports the room’s palette. For a considered edit that balances personal belongings with a welcoming presentation, book a home consult to prepare the space for listing photos.
Pair Home Design: Home Staging
Pair Home Design helps prepare living rooms for listing photos through Home Staging, creating a considered presentation that feels open, welcoming and ready for buyers to imagine as their own. Turn to this support when furniture, decor and personal belongings feel difficult to edit together, or when the room needs a more cohesive look before photography. Home Styling can refine the space, while a Home Consult offers guidance on preparing the home for sale. Each approach focuses on the room’s flow, balance and atmosphere, rather than making it feel impersonal. A thoughtfully staged living room can bring the practical edits in this guide together with a polished, lived-in finish. Contact Pair Home Design to discuss preparing your living room for listing photos.
Prepare your living room for its next chapter
A listing photo is often a buyer’s first chance to picture daily life in a home. Let the room feel inviting, not staged beyond recognition. The final choices should support the property’s character while helping someone new imagine their own routines, conversations and quiet evenings there. That balance gives living room staging for photos a purpose beyond appearance: it helps the space feel cared for and ready for what comes next.
If you’d like a thoughtful outside perspective as you prepare to list, contact Pair Home Design for staging help. A fresh eye can help shape a presentation that feels considered and true to the home. Take the next step when you’re ready, and give buyers room to imagine themselves settling in.
Frequently Asked Questions
How do you stage a living room for real estate photos?
Effective living room staging for photos starts by arranging the room around its clearest focal point, such as a fireplace, large window or appealing view. Angle seating towards that feature, leave a visible path through the room and remove anything that blocks the photographer’s view. Turn on lamps for warmth, then check the arrangement from the doorway and the main camera position.
What should be on a living room staging checklist before a photo shoot?
Before the photographer arrives, check each frame for stray cords, remotes, pet items and fingerprints on glass. Clear coffee tables, straighten cushions and throws, and make sure window coverings sit evenly. Pair Home Design’s Home Consults can guide photo-day preparation. Home Staging is available in Chilliwack and throughout the Fraser Valley and Greater Vancouver, including Abbotsford, Mission, Langley, Surrey, Coquitlam, Burnaby, Maple Ridge, Vancouver, and surrounding communities. Book at least two weeks ahead, especially during busy seasons.
What is the best furniture layout for living room listing photos?
Choose a layout that shows the room’s scale and makes its purpose easy to understand. Keep the largest seating piece from dominating the frame, and arrange chairs so they relate to the sofa without forming a tight wall of furniture. In a narrow living room, try pulling pieces slightly away from the walls to create a more open, intentional conversation area.
How do you declutter and depersonalize a living room for photos?
Clear surfaces until each has a distinct purpose: a small stack of books or a simple vase can remain, while collections and everyday odds and ends are put away. Store family photographs, personal documents and items displaying names or addresses. Keep a few well-chosen objects that add warmth, so the room feels welcoming rather than stripped of character.
Which living room colours and decor photograph well?
Soft, balanced colours such as warm white, beige, muted green and gentle blue can help a living room feel calm on camera. Add contrast with a darker cushion, natural wood or a textured throw rather than relying on busy patterns. Matte finishes can reduce distracting reflections, while a restrained mix of art and accessories keeps the room’s key features in focus.